Click on the the screencast on the left to get an overview of how to create your Screencast Chapter Response for this week.
My Chapter 7&8 Highlights
My Chapter 7&8 Highlights
As I mentioned in class there
are a number of tools available on the Web that do similar functions. My experience is that there is usually a common function
provided by all, but then each application will have a certain unique feature
or attribute. For
this course I chose quick, easy access tools to try and demonstrate how simple
it can be to start exploring some of these in practice.
Photo Sharing
Tools like Flickr and Google's version Picasa, allow you to upload photos and share them via the Web using a variety of mobile devices. As we already have Google account through Boxer we will explore Picasa which has similar to features to other photo sharing apps. Picasa: https://picasaweb.google.com/home
Podcasting
Simply put, podcasting is a digital audio file in an mp3 format. To create a podcast you need a digital audio recorder, server space to host the file, something to say, and time to prepare it. You can find a range of tools, some with editing capabilities to create state-of-the-art podcasts. The tool we will be using is podomatic at http://www.podomatic.com/login
 Screencasting
 One step up from podcasting, is capturing what you are doing on your computer while adding audio narration. Richardson's example in the chapter provides a good overview http://jonudell.net/udell/gems/umlaut/umlaut.html
There are many exciting
ways to integrate this tool into educational practice and a number of tools to achieve
this – e.g. Jing, Camtasia. The tool we will be using, is screencast-o-matic http://www.screencast-o-matic.com/screen_recorder
Resource reviewed http://www.khanacademy.org/Some other Screencasting Tips

From here you will be prompted through a few windows to add your YouTube account so that Screen-o-matic can upload your screencast to You Tube.

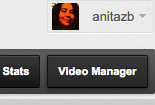 When the screencast has been processed, you will need to go to your You Tube page by clicking on My Channel. On this page you will see the Video Manager button on the top right fo the screen. This will show a list of all of your videos.
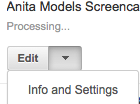 From there you can select the uploaded screencast and use the Edit drop down to get to Info and Settings.
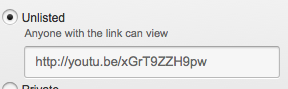 Here you will see the option to select Unlisted - Anyone with the link can view.
 Position your cursor, then click on the little black icon in the WYSIWYG toolbar to Insert a Video. You will then be presented with options for selecting a file and can go directly to My YouTube videos.
Hope that helps, and have fun!
No comments:
Post a Comment